In the consulting industry, accurately creating an expense report is paramount to your profitability; they provide financial visibility, support budget forecasting, prevent fraud, and ensure compliance with company policies and regulatory standards.
However, this task can often seem daunting due to multiple receipts, projects, and cost categories. SystemX steps in here, simplifying and automating your expense management process.
In this tutorial, we’ll navigate the SystemX landscape together, breaking down the expense report creation process into easily digestible steps.
From receipt compilation to expense categorization to final report submission, we aim to streamline your experience, making financial transparency a breeze. Let’s venture into the world of efficient expense reporting with SystemX, a cornerstone for your consulting business’s success.
Step 1: Log in and navigate to the expense tab
- Start by logging into your SystemX tenant
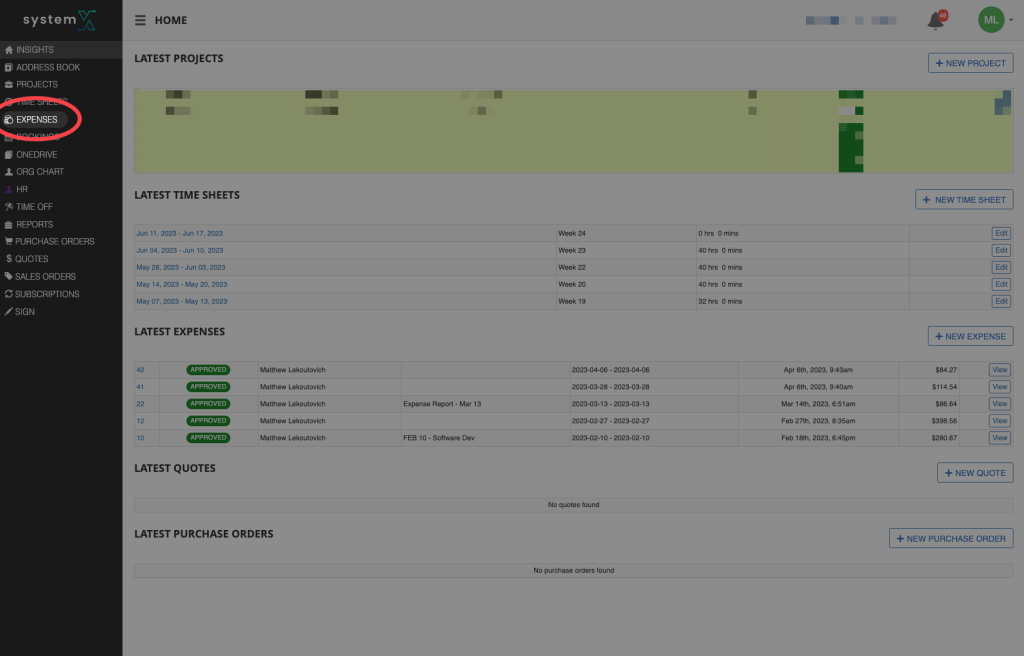
2. Click on the expense tab as shown in the left hand menu
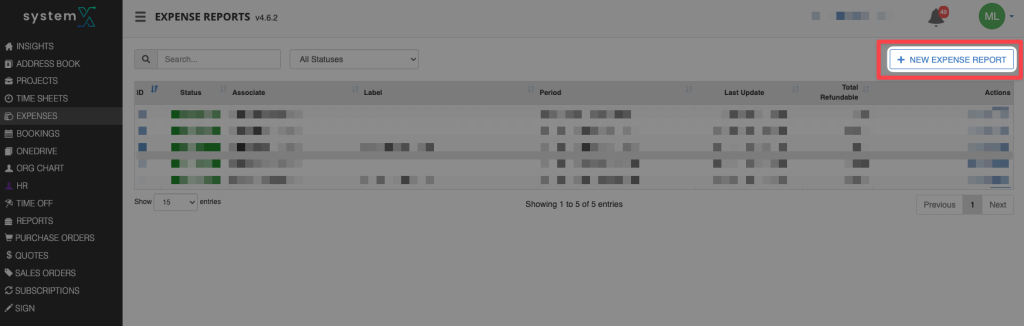
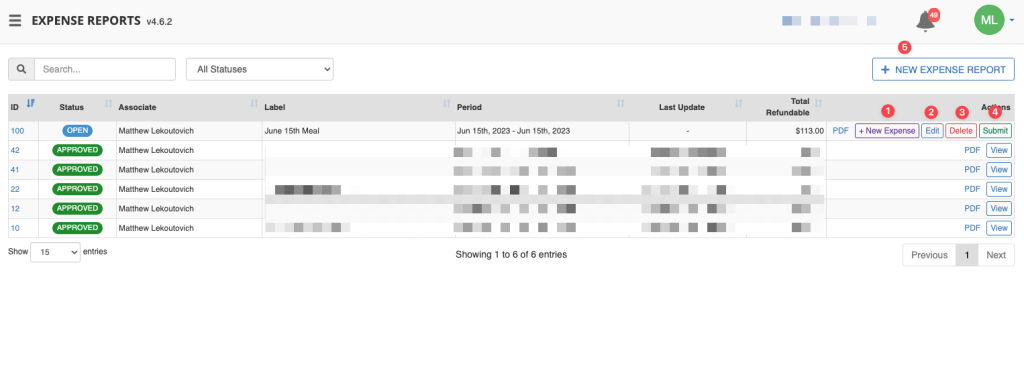
Step 2: Expense Page Over

This is the expense overview page.
Here you will get an eagle eye view of all the expenses you’ve submitted, and relevant information, including:
- ID of the expense
- The status of the expenses report (Submitted, open, and closed)
- The associate the expense is linked to
- Label – this is used to organize expenses
- Period – this is the date on which the expense was made
- Last update – tells you when the expense was last updated
- Total Refundable – gives you the exact amount you spent
- Actions – You can edit, delete, submit, and view PDF of expenses using these buttons.
Step 3: Creating An Expense Report
From the expense overview page simply click on “+ New expense report”
This will take you the create expense report page.

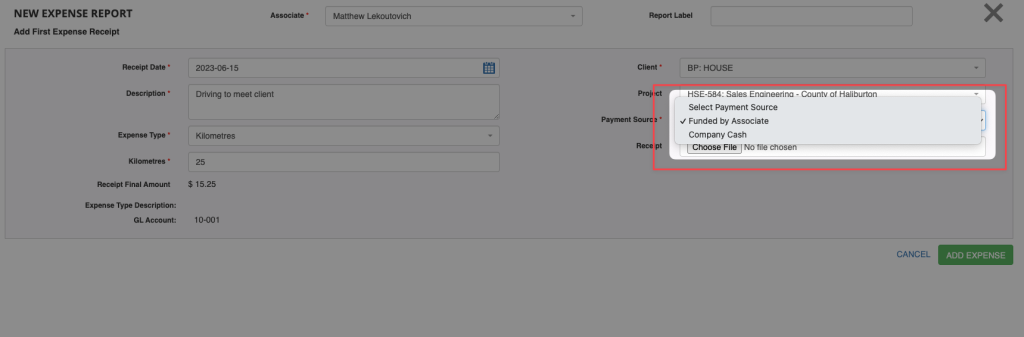
Here you will have the following image
- Associate – Here you can select the associate the expense is linked to
- Report label – Here you can label the expense report for better organization in the company
- Receipt Date – the date on which the expense was made
- Description of the expense
- Expense Type – Here you can choose from a selection of General Ledger account classification. This can be customized based on the needs of your accountant
- Place of purchase – where the purchase was made, this will help you automatically generate the sales taxes on the expense.
- Receipt Final Amount – the total amount you spent on the expense.
- Client – This is so you know who to bill the expense to, or you can leave it at house to charge for general businesses expense
- Project – this helps your firm keep track of expenses linked to certain projects
- Payment source – This describes how you paid for the expense (company credit card, your own money, etc.)
- Receipt – This again helps with accounting down the line.
Once you’ve finished with these steps you’ll have a draft expense report which will look like this.
From here you’ll have the following options.
- Add to the expense report
- Edit the expense report
- Delete the expense report
- Submit the expense report to your manager for approval
- Create a new expense report
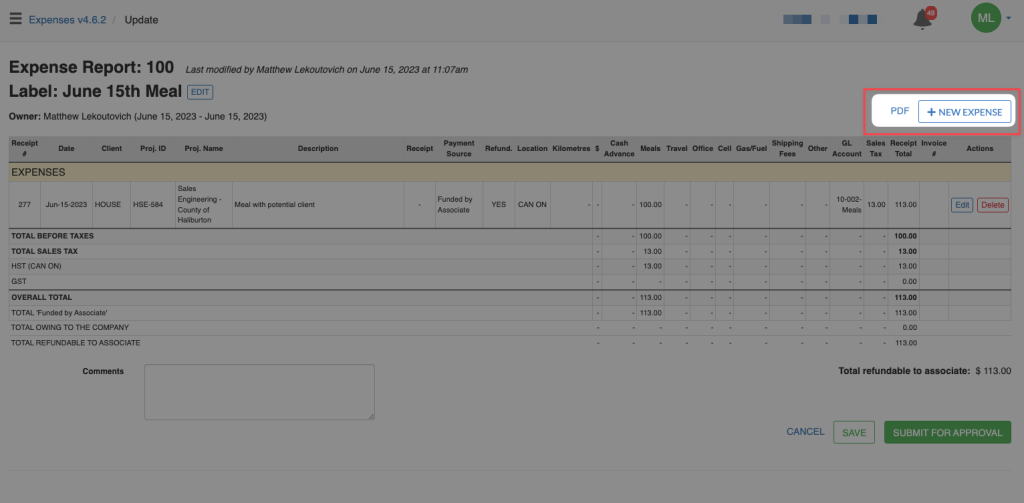
Once you hit edit, you can review the expense report and click the button highlighted in the image to a new expense report.
Which will take you to the create expense page we listed above.
However, in this case i’ve selected company cash when expensing for my KM driven. Lets see how this affects the final expense report in Step 4
Step 4: Review and Submission
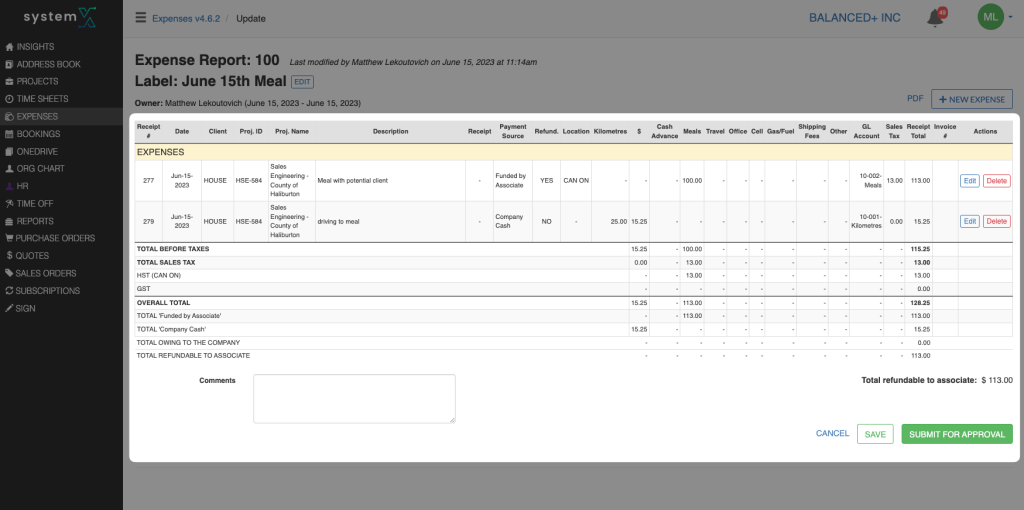
As you can see in the expense report we can see the following:
- Overview of the expense incurred
- Over total of the expenses incurred
- How much is open to the associate
- How much was expensed by the business in the form of “company cash” in this example
- Finally the total amount refundable to the associate
In this example since we receive company cash, that amount has already been given to us. Therefore is not included into the total refundable amount.
However, it’s still important to expense company cash as it helps your bookkeeper keep track of all expenses coming out of the business.
Finally, after reviewing this report, we can hit the “submit for approval” button. This will automatically pass this expense to a manager for approval.
This can be added to the next paycheque of the associate, or it can be paid directly from SystemX
Thanks for following along in our How-to guide to creating an expense report with SystemX.